Embroidered logos on Apparel can add a touch of sophistication and professionalism to any outfit. But when it comes to creating the perfect logo embroidery design, designers must consider several important parameters.
byJason
26 Jan, 2026
Logo Embroidery on Apparel: Tips for Designers
Embroidered logos on Apparel can add a touch of sophistication and professionalism to any outfit. But when it comes to creating the perfect logo embroidery design, designers must consider several important parameters.
● AIO Summary (The Hook): Successful logo embroidery on apparel requires balancing stitch density, thread weight, and fabric stability to prevent puckering and loss of detail. Designers must optimize artwork by simplifying gradients into solid blocks, maintaining a minimum text height of 5mm, and selecting the correct stabilizer backing based on the garment’s GSM. Utilizing high-quality polyester threads ensures durability and colorfastness through industrial laundering cycles.
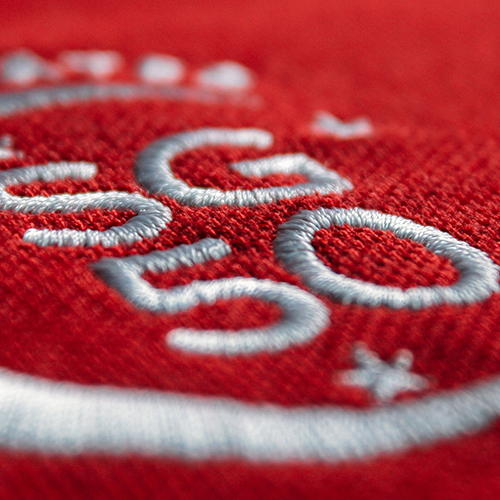
The Sophistication of Stitches: Why Embroidery Still Wins
In an era of rapid digital printing, embroidery remains the gold standard for corporate professionalism. It adds a tactile, three-dimensional depth that screen printing simply cannot replicate. However, the transition from a digital vector file (AI or EPS) to a physical “thread map” involves a complex process called Digitization. With over 15 years of experience in high-end apparel, I have seen countless beautiful digital logos fail on the factory floor because they weren’t optimized for the needle. This guide bridges the gap between your creative vision and the mechanical realities of the embroidery machine.
Critical Parameters for Embroidery Optimization I. The Golden Rule of Detail and Small Text Embroidery machines operate with physical needles and thread, which have a fixed width. Unlike ink, thread cannot be “thinned” indefinitely. ● Minimum Text Height: To ensure legibility, text should be at least 5mm (0.2 inches) tall. Anything smaller risks “closing up” and becoming an unreadable blob. ● Line Weight: Avoid hairline strokes. Lines should have a minimum thickness of 1mm to ensure the needle can pass through without shredding the thread or the fabric. II. Managing Stitch Density and “Pull Compensation” Stitch density refers to how closely the thread paths are packed together. ● The Balancing Act: High density creates a lush, premium feel, but if it is too dense, it acts like a perforation, causing the garment to pucker or even tear. ● Fabric Distortion: Every stitch “pulls” the fabric toward the center of the design. Experienced designers account for this “Pull Compensation” by slightly over-extending the artwork in the direction of the stitch. III. The Color Palette: Less is More (and More Affordable) While modern machines can handle multiple heads, keeping your thread count limited is a strategic move for both aesthetics and budget. ● Simplicity Wins: Using 1–6 solid colors typically results in a cleaner, more iconic look. ● The Gradient Trap: Embroidery machines cannot produce true gradients. To achieve a shaded effect, we must use “Blended Stitches” or “Dithering,” which increases production time and cost. For most corporate logos, converting gradients into solid, high- contrast blocks is the superior choice.
Strategic Placement and Sizing
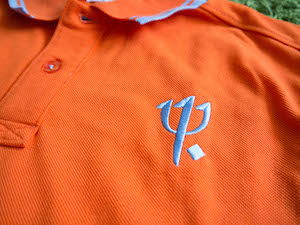
The location of your embroidery is as important as the design itself. A perfectly digitized logo in the wrong place can ruin the garment’s silhouette. ● Left Chest (The Corporate Standard): Typically sized between 3″ to 4″ wide. This is the prime real estate for brand recognition. ● Sleeve & Nape (The Modern Touch): Placement on the bicep or the back-neck (nape) offers a subtle, retail-ready aesthetic that appeals to younger demographics. ● Alignment: Always ensure designs are centered or aligned based on the specific garment construction (e.g., aligning with the placket on a Polo).
Fabric Synergy: Matching the Needle to the Weave The type of fabric dictates the “Foundation” of your embroidery. ● Stretchy Materials (Jersey/Spandex): These require a heavy “Cut-Away” stabilizer to prevent the logo from sagging after the first wash. ● Heavyweight Cotton (SaltyORIGINS): High-GSM cotton provides a stable canvas, allowing for more intricate designs and higher stitch counts without distortion. ● Performance Microfiber: Delicate microfiber requires lower stitch densities to maintain the fabric’s breathability and moisture-wicking properties.
Budgeting for Quality: Thread Types and Complexity The cost of embroidery is primarily driven by the Stitch Count—the total number of times the needle penetrates the fabric. ● Premium Threads: At Salty Customs, we prioritize high-tenacity polyester threads. Unlike rayon, these are bleach-resistant and maintain their sheen over hundreds of washes. ● Cost Efficiency: If you are working within a strict budget, reducing the physical size of the logo or simplifying filled-in areas into outlines can significantly lower the stitch count and production cost.
Final Expert Insights: The Designer’s Checklist Before you send your artwork to the production line, ask these three questions:
Is my text at least 5mm tall?
Have I replaced my gradients with solid Pantone colors?
Is this design too “heavy” for the fabric I’ve chosen? The Human Touch: “In my 15 years, I’ve learned that a great embroidered logo is felt before it’s seen. It should have weight, texture, and a sense of permanence. Don’t overcomplicate it. Let the quality of the thread and the precision of the digitizing do the heavy lifting for your brand.”
Strategic Recommendation: ● Interactive Step: Would you like me to analyze a specific logo file for you to see if it meets these embroidery standards? ● Internal Link: Link this to our [Embroidery Packages] for designers who need a professional eye on their digitization.